Is a home insemination kit actually worth it?
When should you do ICI so you don’t waste a cycle?
And what’s with the headlines about donors and legal parenthood?
Yes, a home insemination kit can be a practical option for people trying intracervical insemination (ICI), especially if you want a lower-cost, lower-intervention path before considering IVF. Timing matters more than gadgets. And the legal side matters more than most people realize—especially if you’re using a known donor.
Quick note on the culture moment: celebrity baby announcements are everywhere right now, and they can make trying feel like a highlight reel. Real life is messier. If you’re exploring at-home options, you deserve a plan that’s calm, clear, and built to protect your time and budget.
Overview: What ICI is (and what it isn’t)
ICI means placing semen in the vagina close to the cervix, usually with a syringe designed for insemination. It’s different from intercourse, but it’s also different from IUI, which places washed sperm into the uterus and is usually done in a clinic.
People often look at ICI when they want:
- A lower-cost alternative to clinic cycles
- More privacy and control
- An option for solo parents, LGBTQ+ families, or couples with timing/sexual-function barriers
Medical disclaimer: This article is general education, not medical advice. It can’t diagnose or treat conditions. If you have pelvic pain, recurrent pregnancy loss, known fertility issues, or questions about donor screening, talk with a licensed clinician.
Timing: The budget-friendly way to aim for your fertile window
If you only optimize one thing, make it timing. Many people overspend on supplies and under-invest in tracking ovulation.
Use a simple “two-day” target
For many cycles, a practical approach is to plan ICI for:
- The day you see a positive LH test (surge)
- The next day
This keeps it focused. It also reduces the “let’s try every day for a week” burnout that can turn trying into a chore.
What if your cycles are irregular?
Start testing earlier than you think you need to. Track cervical mucus if you can. If you’re routinely unsure when you ovulate, it may be worth discussing ovulation tracking options with a clinician before you spend cycle after cycle guessing.
Supplies: What you actually need (and what’s just nice to have)
You don’t need a drawer full of extras. You need a clean setup and the right basics.
Core items
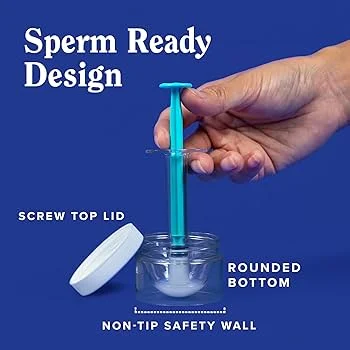
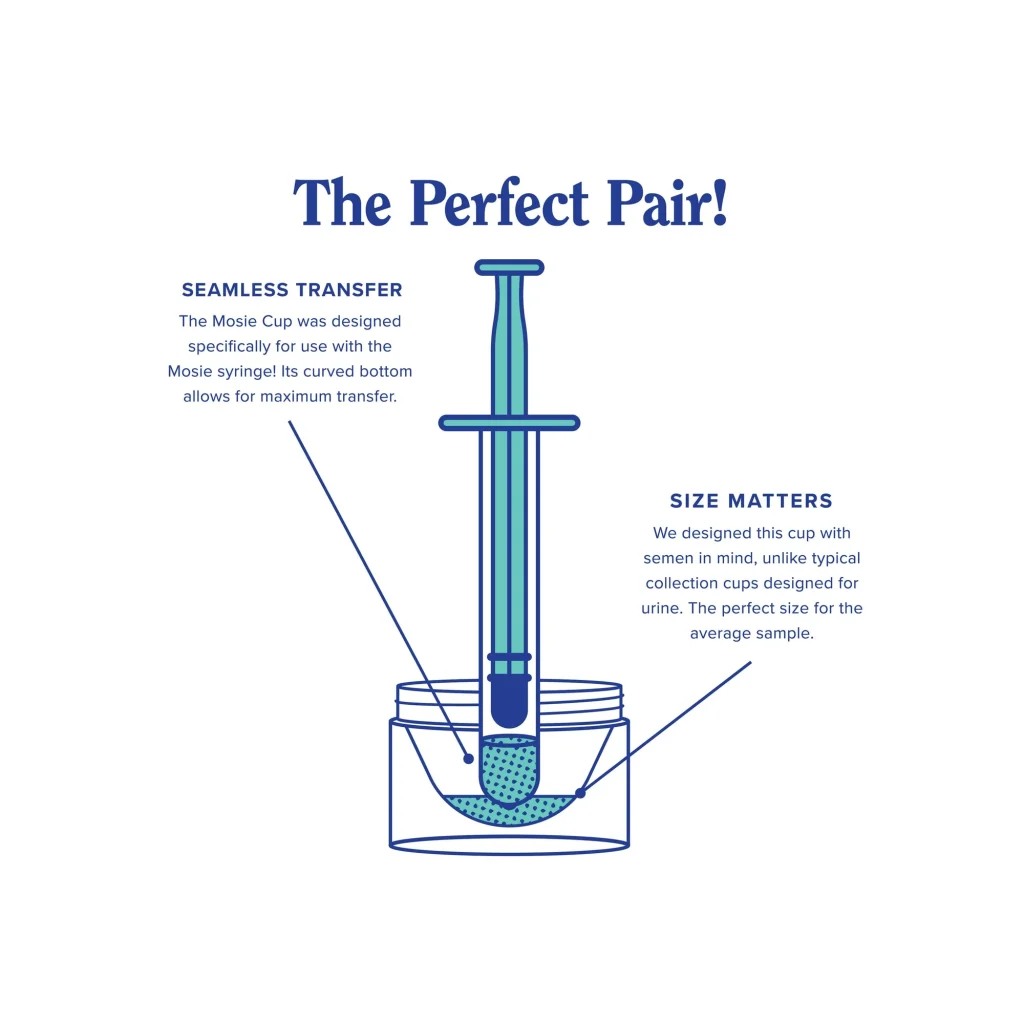
- Needle-free syringe made for insemination (never use a needle)
- Collection cup (sterile or clean, single-use is simplest)
- Ovulation tests (LH strips) and a way to track results
- Clean hands + clean surface (simple hygiene beats fancy tools)
Helpful add-ons (optional)
- Disposable gloves
- A towel or absorbent pad
- A pillow for comfort (not required)
If you’re shopping, look for a complete option like an at-home insemination kit for ICI with syringe and collection cups so you’re not scrambling at the last minute.
Step-by-step: A simple ICI walkthrough (no drama, no wasted motion)
Keep the environment calm. Rushing increases mess and stress, and stress makes it harder to stick to your plan next cycle.
1) Prep your space
Wash hands. Lay out supplies. Set a timer if that helps you stay unhurried.
2) Collect the sample
Use the collection cup. Avoid lubricants unless they’re fertility-friendly. If you’re unsure, skip them.
3) Draw the sample into the syringe
Pull slowly to reduce bubbles. Keep the syringe tip clean. If something touches an unclean surface, switch to a new sterile item when possible.
4) Get into a comfortable position
Many people choose lying on their back with knees bent. Comfort is the goal. You don’t need an extreme angle.
5) Inseminate slowly
Insert the syringe gently into the vagina (not into the cervix). Depress the plunger slowly to reduce leakage.
6) Rest briefly
Staying down for about 10–20 minutes is a common, practical choice. Use the time to breathe. Put on a show. Let it be normal.
Common mistakes that waste a cycle (and how to avoid them)
Mistake #1: Treating timing like a guess
Fix: Use LH tests and track the surge. If you can only do one attempt, prioritize the surge day or the day after.
Mistake #2: Overcomplicating the setup
Fix: Fewer steps means fewer slip-ups. You’re aiming for consistent, repeatable attempts.
Mistake #3: Using the wrong tools
Fix: Use a needle-free syringe designed for insemination. Avoid improvised items that can irritate tissue.
Mistake #4: Ignoring the legal side with a known donor
Fix: Don’t assume a casual agreement is enough. Recent news coverage has highlighted disputes and court decisions involving at-home insemination and parental rights. If you’re using a known donor, consider getting legal guidance before you start, not after emotions run high.
To understand what people are reacting to, see this related coverage: Florida Supreme Court makes ruling in at-home artificial insemination case.
FAQ: Quick answers before you try
Is ICI a reasonable IVF alternative?
For some people, yes—especially if there’s no known infertility diagnosis and you want to start with lower-intervention options. IVF can be appropriate for other situations. A clinician can help you decide based on age, history, and timing.
Should I do ICI multiple times in one day?
Usually it’s not necessary. Most people do best focusing on the fertile window rather than repeating attempts out of panic.
What if semen leaks out afterward?
Some leakage is common. It doesn’t automatically mean the attempt “failed.” Rest briefly, then go about your day.
CTA: Make your next attempt simpler (and more protected)
If you’re trying ICI at home, your goal is consistency: solid timing, clean supplies, and a plan you can repeat without burning out.
How does at-home insemination (ICI) work?
Medical disclaimer: Educational content only. Not a substitute for medical or legal advice. For personal guidance, consult a qualified healthcare professional and, if using a known donor, a family law attorney in your jurisdiction.