Is a home insemination kit actually worth trying?
What matters more: the kit, or the timing?
And why are headlines suddenly talking about at-home donors and legal parenthood?
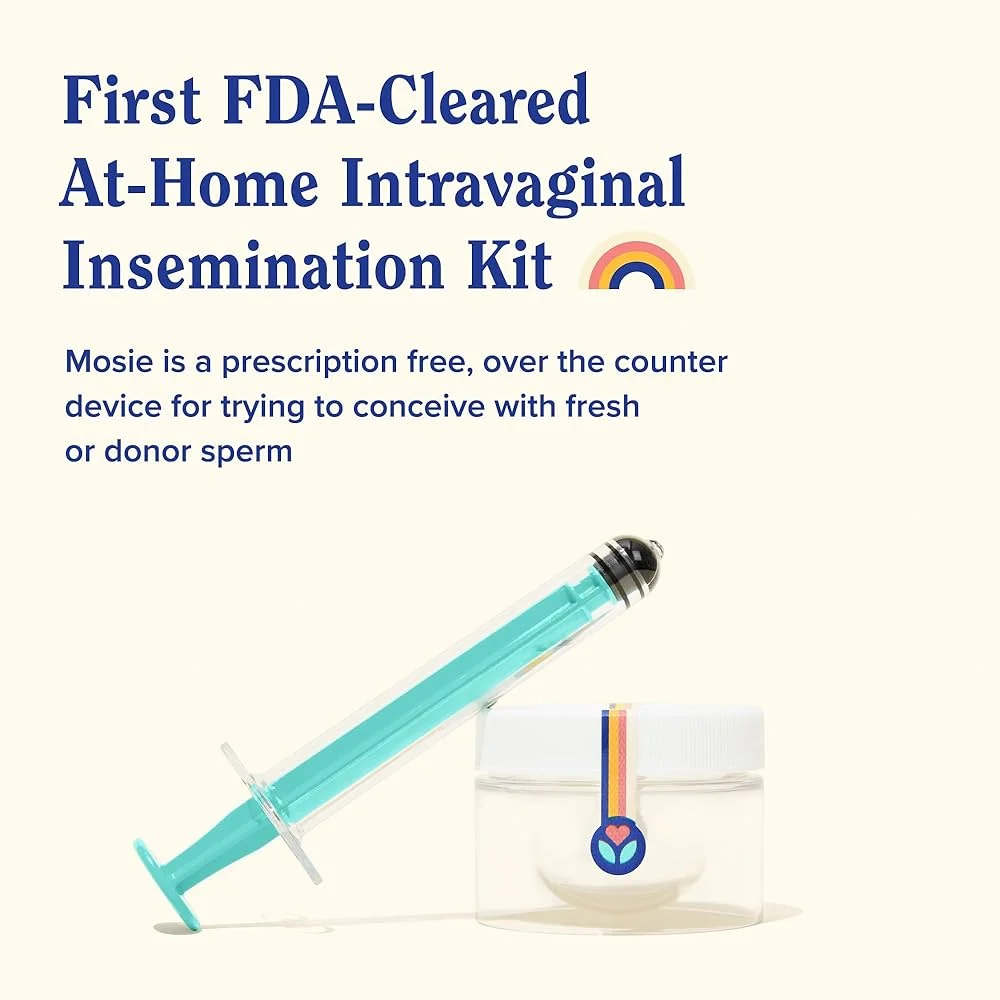
Yes, at-home insemination (ICI) can be a real option for some people. Timing usually makes the biggest difference. And the legal side is getting louder right now—especially after recent Florida coverage about at-home artificial insemination and donor parentage.
Is at-home insemination (ICI) a realistic IVF alternative?
For many households, ICI is the “start here” step before jumping to clinic-based options. It’s less invasive than IUI and far less complex than IVF. That simplicity is the point.
ICI is not a cure-all, and it won’t bypass every fertility barrier. If blocked tubes, severe male-factor infertility, or certain ovulation issues are in play, a clinic plan may be more effective. Still, when people talk about “IVF alternatives,” they often mean, “What can we try first that’s lower cost and lower intensity?” ICI fits that lane.
Pop culture helps explain the surge in interest. Celebrity pregnancy lists and announcement roundups keep baby news in everyone’s feed, and TV drama loves a surprise parentage twist. Real life is less cinematic, but the curiosity is the same: how do people build families outside the classic script?
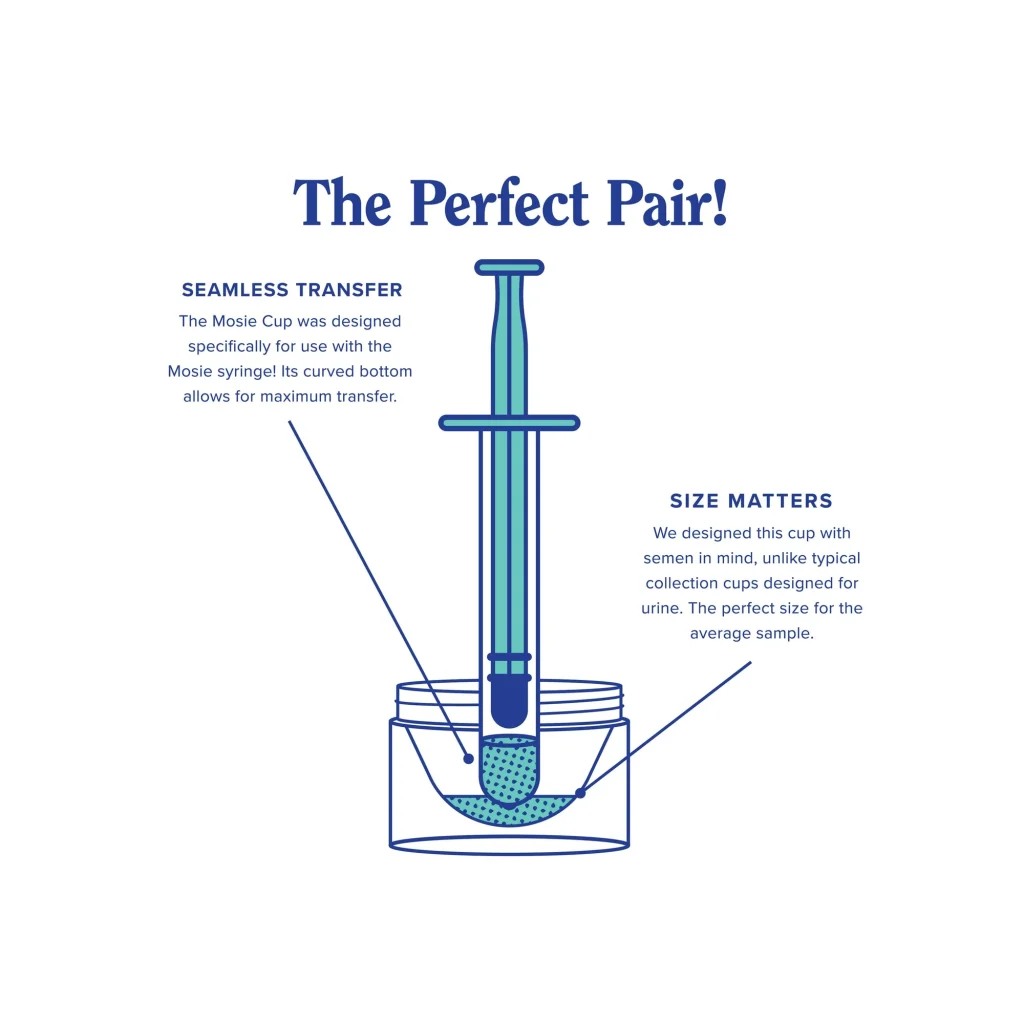
What should a home insemination kit do (and not do)?
A home insemination kit should make the process cleaner, simpler, and more consistent. It should not add risk or mystery.
What “good enough” looks like
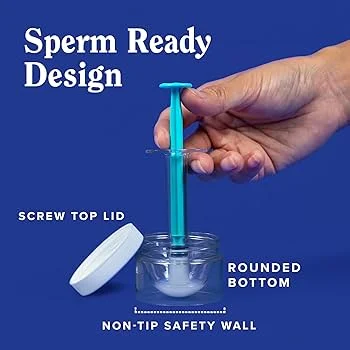
- Body-safe, sterile components designed for insemination.
- Clear, step-by-step instructions you can follow when you’re nervous or tired.
- Comfort-focused design so you don’t rush or improvise.
What to avoid
- Non-sterile tools or household substitutes.
- Anything that causes pain or requires force.
- Vague guidance that leaves you guessing about timing and handling.
If you’re comparing options, start with “Is this designed for ICI?” not “Is this trendy?” A kit can support a plan, but it can’t replace one.
Looking for a practical option? Consider an at-home insemination kit for ICI that’s built for consistency and comfort.
When is the best time to do ICI at home?
If you only improve one thing, improve timing. Most disappointment stories trace back to missed ovulation, not a “bad kit.”
A timing-first approach that stays simple
- Track your cycle length for at least 1–2 cycles if you can.
- Use OPKs to catch the LH surge.
- Watch cervical mucus (often becomes clearer/slipperier near ovulation).
- Aim for the fertile window: commonly the day before ovulation and/or the day of ovulation.
Don’t over-engineer it. You’re trying to place sperm close to the cervix when an egg is most likely to be available. That’s the core idea.
If your cycles are irregular
Irregular cycles can make the fertile window harder to spot. OPKs may still help, but timing can become guesswork. If you’re frequently unsure when you ovulate—or you don’t seem to ovulate—consider talking with a clinician about basic labs or ovulation support.
What are people worried about right now (beyond the biology)?
Two words: paperwork and parentage.
Recent reporting has highlighted a Florida Supreme Court decision connected to at-home artificial insemination, plus commentary that at-home sperm donors may be able to pursue legal parent status in some circumstances. That’s not gossip. It’s a reminder that “DIY” can collide with family law.
If you want a starting point for the broader conversation, see this coverage via Florida Supreme Court makes ruling in at-home artificial insemination case.
Practical takeaways (without the legal rabbit hole)
- Verbal agreements can fail when relationships change.
- State rules vary and can treat “at-home” differently than clinic pathways.
- Talk to a family lawyer early if donor arrangements are involved.
Politics and courts can shift the background noise fast. If you’re building a family, that noise can become your reality. Planning beats scrambling.
What’s a simple ICI checklist for the day you try?
- Confirm timing (OPK result + cycle context).
- Set up a clean space so you don’t rush.
- Follow the kit instructions step by step.
- Stay comfortable; stop if you feel sharp pain.
- Write down what you did (date/time, OPK status) to learn for next cycle.
Consistency matters. Treat it like a repeatable routine, not a one-off experiment.
FAQ: quick answers people want before they try
Can stress ruin my chances?
Stress can affect sleep, libido, and cycle regularity for some people. Still, timing and underlying fertility factors usually matter more than having a “perfectly calm” day.
Should I try multiple times in one cycle?
Some people try more than once during the fertile window. The best approach depends on sperm availability, timing confidence, and personal comfort.
Is spotting after trying normal?
Light spotting can happen for different reasons, including cervical irritation. Heavy bleeding or significant pain should be discussed with a clinician.
Ready to learn the process before you buy anything?
Start with the mechanics and the timing. Then decide what tools you want to support your plan.
How does at-home insemination (ICI) work?
Medical disclaimer: This article is for general education and is not medical or legal advice. It does not diagnose, treat, or replace care from a licensed clinician. If you have irregular cycles, pelvic pain, a history of infertility, or concerns about donor agreements and parentage, consult a qualified healthcare professional and a family-law attorney in your state.