Blog Post Title: Inside the Insemination Syringe Box: What to Expect and How to Use It
Summary:
The process of insemination can be overwhelming and intimidating, especially for those who are trying it for the first time. One of the essential tools for insemination is the insemination syringe, which comes in a box with various components. In this blog post, we will take a closer look at what to expect inside the insemination syringe box and how to use it effectively.
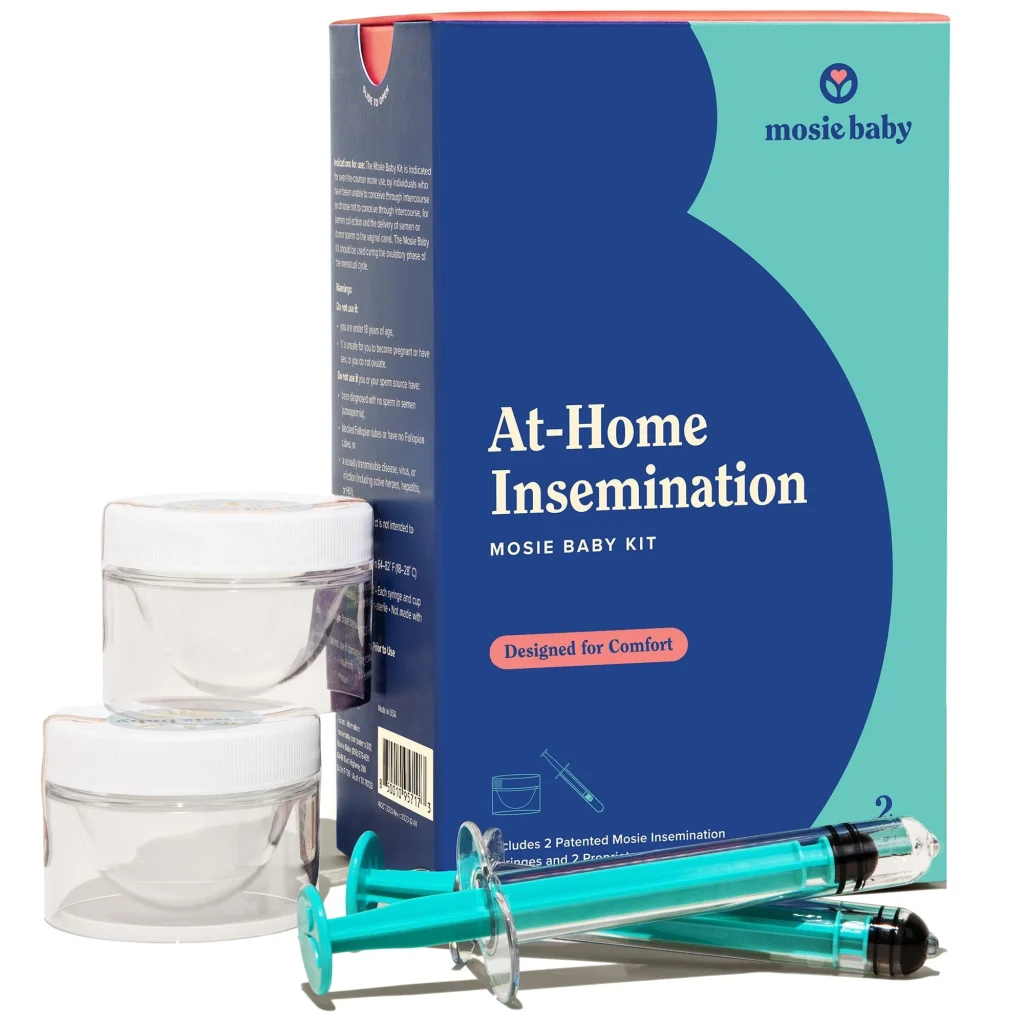
First, let’s start with the components inside the box. Depending on the brand and type of syringe, the box may contain a syringe, a cap, a plunger, a needle, and sometimes, a vial adapter. It is essential to familiarize yourself with each component and its purpose before starting the insemination process.
The syringe is the primary tool used for insemination. It is usually made of plastic and comes in various sizes, ranging from 1ml to 10ml. The size of the syringe will depend on the amount of semen or fertility medication that needs to be injected. The cap is used to cover the needle and keep it sterile. The plunger is used to push the semen or medication into the vagina or cervix. The needle is a crucial component for those using fresh semen, as it is used to extract the semen from the vial. The vial adapter is used to transfer frozen semen from the vial into the syringe.
Inside the Insemination Syringe Box: What to Expect and How to Use It
Now that we have a better understanding of the components inside the insemination syringe box let’s discuss how to use it. The first step is to make sure that all the components are sterile. It is recommended to use a new syringe for each insemination to reduce the risk of infection. Once you have opened the box, carefully remove the syringe, needle, and cap, and place them on a clean surface.
If you are using fresh semen, you will need to attach the needle to the syringe and extract the semen from the vial. It is crucial to follow the instructions provided by your healthcare provider or donor on how to properly extract the semen. Once the semen is in the syringe, remove the needle and replace it with the cap. This step is crucial as it prevents air from entering the syringe, which can damage the sperm.
If you are using frozen semen, you will need to attach the vial adapter to the syringe and transfer the semen from the vial into the syringe. Again, it is essential to follow the instructions provided to ensure that the semen is transferred correctly.
Before inserting the syringe, it is recommended to lie down with your hips elevated using a pillow. This position helps the semen or fertility medication to reach the cervix more efficiently. Gently insert the syringe into the vagina, aiming towards the cervix. Slowly push the plunger to release the semen or medication. Once you have emptied the syringe, remove it and remain lying down for 15-20 minutes to allow the sperm to travel towards the egg.
After the insemination process, it is essential to dispose of the syringe and other components properly. Make sure to follow the instructions provided by your healthcare provider or donor on how to dispose of any leftover semen or medication.
In conclusion, the insemination syringe box contains all the necessary components for a successful insemination process. By familiarizing yourself with the components and following the instructions provided, you can effectively use the syringe to increase your chances of conception. Remember to always use a new syringe for each insemination, and dispose of the components properly. With the right tools and techniques, insemination can be a less daunting experience.
Leave a Reply