

Is everyone suddenly talking about pregnancy? Between celebrity baby news making the rounds, relationship storylines in TV dramas, and the way politics keeps debating families like they’re a talking point, it can feel nonstop.
Is at-home insemination (ICI) actually a realistic option? For some people, yes—especially when sex isn’t easy, timing is stressful, or you want a lower-intervention step before considering IVF.
What matters most if you’re using a home insemination kit? Timing. Not perfection, not fancy extras—getting close to ovulation without spiraling is the biggest lever you control.
Quick context: why ICI is trending in everyday conversations
Celebrity pregnancy announcements come in waves, and they often spark a familiar group chat question: “Wait, how did they do it?” Most headlines don’t give details, but the cultural effect is real. People start comparing timelines, ages, and “bounce-back” myths.
At the same time, you’ll see more mainstream talk about the number 35. It shows up in articles and feeds as a milestone, yet fertility is more nuanced than a single cutoff. It depends on many factors for both eggs and sperm, plus cycle regularity and overall health.
If you’re exploring ICI at home, you’re not alone. You’re also not behind. You’re just choosing a path with fewer appointments and more control over your environment.
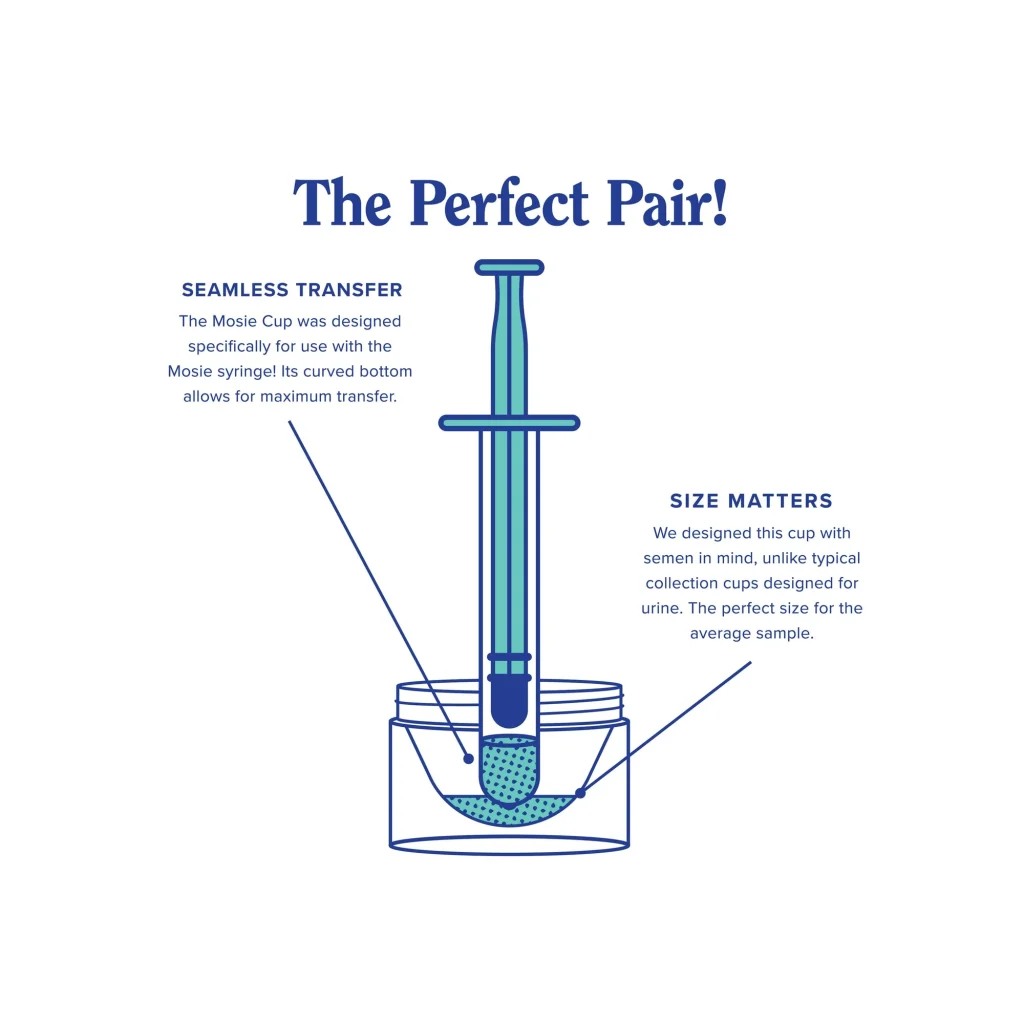
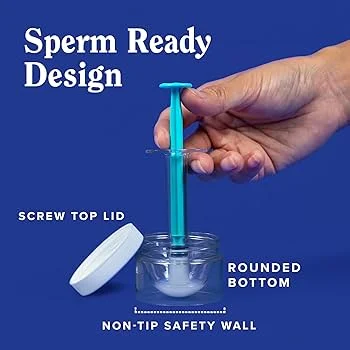
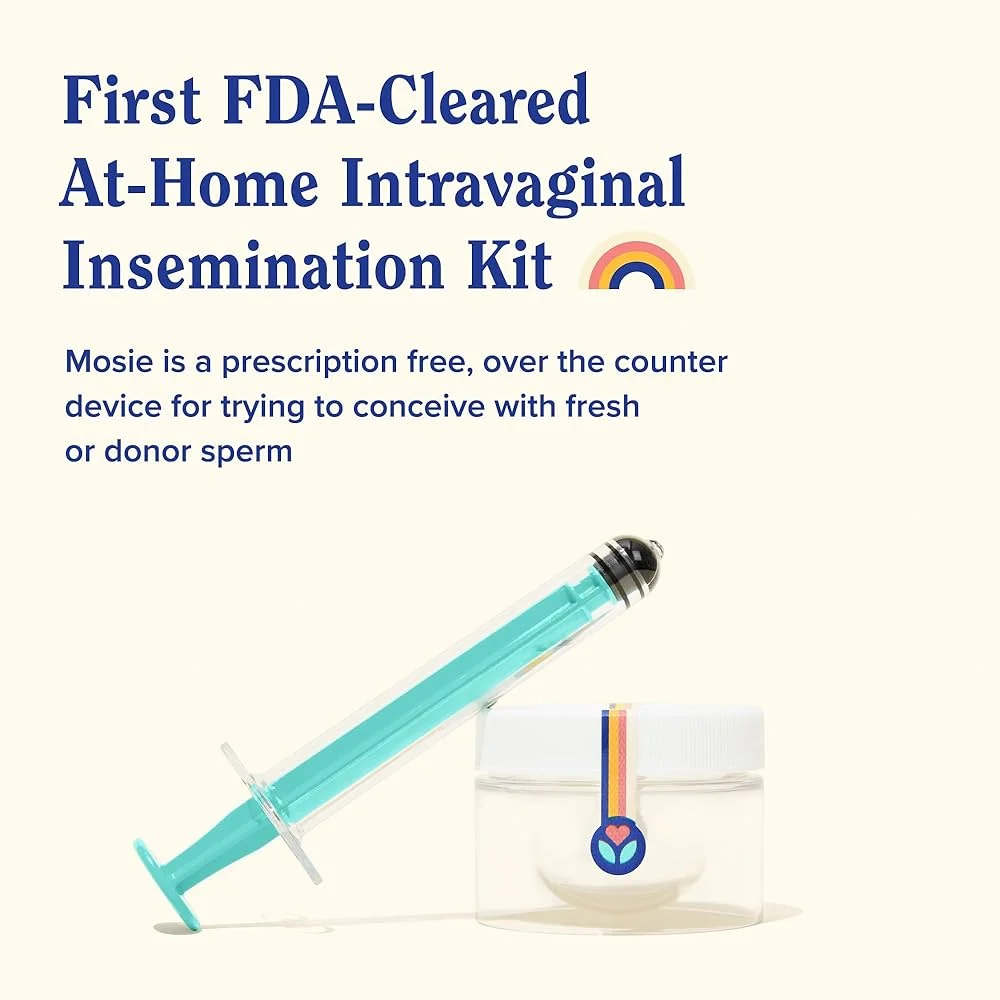
Before the decision tree: what a home insemination kit is (and isn’t)
A home insemination kit is typically used for ICI—intracervical insemination—where semen is placed in or near the vagina around ovulation. It’s not IVF. It’s also not IUI, which is done in a clinic and places sperm into the uterus.
Some people like ICI because it can reduce pressure, support single parents by choice, and help couples who want an alternative to timed intercourse. Others use it as a stepping stone before clinic treatment.
Your ICI decision tree (If…then…)
If your cycles are predictable, then keep timing simple
If your period tends to show up on schedule, you can usually avoid tracking overload. Start with ovulation predictor kits (OPKs) for a cycle or two to learn your pattern.
Then aim ICI around your LH surge. Many people try the day of a positive OPK and again the next day. Follow your kit instructions and prioritize consistency over doing “everything.”
If your cycles are irregular, then focus on signs—not just the calendar
If your cycle length changes a lot, counting days can mislead you. OPKs can still help, but you may need more testing days. Cervical mucus changes may also provide clues.
If you’re frequently unsure when you ovulate, it can be worth discussing basic labs or an ultrasound plan with a clinician. You’re not failing at tracking. Your body may just need a different approach.
If stress is high, then pick the lowest-friction routine you can repeat
If you feel yourself getting pulled into endless apps, charts, and “perfect timing” threads, simplify. Choose one primary tracking method (often OPKs) and one backup cue (like mucus).
Think of it like choosing a movie after a long day: you don’t need eight recommendations and a debate. You need one solid choice you’ll actually watch. Your fertility plan should feel the same—doable, not punishing.
If you’re using donor sperm, then plan for timing and handling
If donor sperm is part of your plan, timing becomes even more important because you may have limited vials. Read storage and thawing guidance from the source carefully and follow your kit directions.
Also consider building a simple “cycle note” each month: OPK date, insemination day(s), and any unusual symptoms. Clear notes reduce second-guessing later.
If you’re thinking “I’m 35—am I out of time?”, then zoom out
Age 35 gets treated like a cliff, but fertility doesn’t flip like a switch on a birthday. It’s shaped by a complex set of factors for women and men, including egg supply, sperm quality, and general health.
If you’re 35+ and you want a more structured plan, you can still try ICI while also setting a checkpoint for getting help. A clinician can tailor that timeline to your history without fear-based messaging.
If you want an IVF alternative, then define what “alternative” means for you
For some, “IVF alternative” means starting with the least invasive option first. For others, it means avoiding injections or high costs. ICI can fit that goal, but it’s not the right tool for every diagnosis.
If you have known tubal issues, severe male factor infertility, or repeated losses, don’t force ICI to carry the whole plan. In those cases, a clinic evaluation may save time and heartache.
Timing without overcomplicating: a practical mini-plan
1) Pick one primary signal. OPKs are the simplest for many people. Use the same brand for a few cycles so results are comparable.
2) Aim for a tight window. Plan ICI around the LH surge and the following day if possible. Don’t chase “exact hour” precision.
3) Keep your environment calm. Set up what you need ahead of time. Hygiene matters, but you don’t need a sterile operating room vibe.
4) Avoid sperm-unfriendly products. Some lubricants can interfere with sperm movement. If you need a lubricant, consider one labeled fertility-friendly and follow product guidance.
Safety and expectation checks (quick, not scary)
At-home insemination should never involve sharp instruments or anything that could injure the cervix or vagina. Use only what’s designed for this purpose and follow instructions carefully.
If you have significant pelvic pain, unusual bleeding, fever, or a history that raises concern, pause and contact a clinician. Getting help is a strategy, not a setback.
A note on tech hype (and what actually helps)
It’s tempting to assume an app can solve timing. Some tools use prediction models, and you’ll see “smart fertility” language everywhere. If you’re curious about the broader concept behind that hype, here’s a neutral explainer on home insemination kit.
In real life, your body’s signals still matter more than any forecast. Use tech as support, not as a judge.
FAQ: fast answers for common ICI questions
Is ICI the same as IUI?
No. ICI is done at home and places semen in the vagina. IUI is a clinic procedure that places washed sperm into the uterus.
When is the best time to do ICI at home?
Many people aim for the day of an LH surge and/or the next day. Your best window depends on your cycle patterns.
Do I need ovulation tests?
No, but they can reduce guesswork. Some people combine OPKs with mucus changes or basal body temperature.
Can age 35 make ICI impossible?
No. Fertility is influenced by multiple factors and doesn’t drop on a single date. A clinician can help you personalize expectations.
How long should we try before seeking help?
It depends on age, cycle regularity, and medical history. If you’re worried or you’ve tried several cycles without progress, consider a professional evaluation.
Try a kit built for ICI at home
If you want a straightforward setup, start with a purpose-made option and follow the included instructions. Here’s a related resource: at-home insemination kit for ICI.
How does at-home insemination (ICI) work?
Medical disclaimer: This article is for general education and does not provide medical advice, diagnosis, or treatment. If you have health concerns, infertility risk factors, or symptoms like severe pain or heavy bleeding, consult a qualified clinician.