


Before you try at-home insemination, run this quick checklist:

- Timing: You have a plan to track ovulation (OPKs, cervical mucus, and/or BBT).
- Tools: A clean home insemination kit and a calm, private setup.
- Sample plan: You know how semen will be collected and used promptly.
- Comfort: Pillows, towel, and a realistic “no-rush” window.
- Safety: You’re avoiding anything that could irritate the vagina or harm sperm.
What people are talking about right now (and why it matters)
It’s hard to miss the baby buzz. TV hosts share celebrity pregnancy announcements, entertainment sites run “who’s expecting” roundups, and public speculation follows any high-profile “maybe bump” moment. That chatter can be fun, but it also nudges real people into comparing timelines.
At the same time, fertility headlines keep circling one number: 35. Recent commentary has pushed back on the idea of a sudden cliff, pointing out that fertility depends on many factors for both women and men. That nuance matters if you’re considering ICI at home and trying to decide how quickly to escalate to testing or treatment.
Even the science news gets attention—like research progress in animal IVF. It’s not directly about human home insemination, but it keeps fertility in the cultural spotlight. More spotlight often means more myths, too.
The medical reality you actually need (no hype)
ICI is simple in concept
Intracervical insemination (ICI) places semen near the cervix, typically with a syringe-style applicator. It’s different from IUI (done in clinics) and very different from IVF (lab fertilization and embryo transfer).
Timing usually beats “special tricks”
Most at-home attempts succeed or fail based on ovulation timing, sperm quality, and underlying factors—not on elaborate positioning hacks. If you only optimize one thing, optimize timing.
Ovulation predictor kits (OPKs) can help you catch the fertile window. Cervical mucus changes can help too. Some people add basal body temperature tracking to confirm ovulation after the fact.
Age is a factor, not a stopwatch
The “35” conversation gets oversimplified online. Fertility does change with age, but it doesn’t flip like a switch on a birthday. Cycle regularity, ovarian reserve, sperm parameters, and health conditions all play a role.
If you’re feeling pressured by the noise, consider turning that anxiety into action: track cycles for clarity and decide in advance when you’ll seek testing if results don’t come.
Don’t let algorithms write your plan
Social feeds can make it seem like everyone is pregnant at once. Recommendation engines amplify what you click. That’s true whether you’re scrolling celebrity news or fertility tips. If you’re curious how these systems work, here’s a general explainer on home insemination kit.
How to try ICI at home (tools, technique, comfort, cleanup)
1) Set up your space first
Start with a clean surface, good lighting, and privacy. Put down a towel. Keep tissues and a small trash bag nearby. A pillow under the hips can make positioning easier, but you don’t need to turn your bedroom into a medical set.
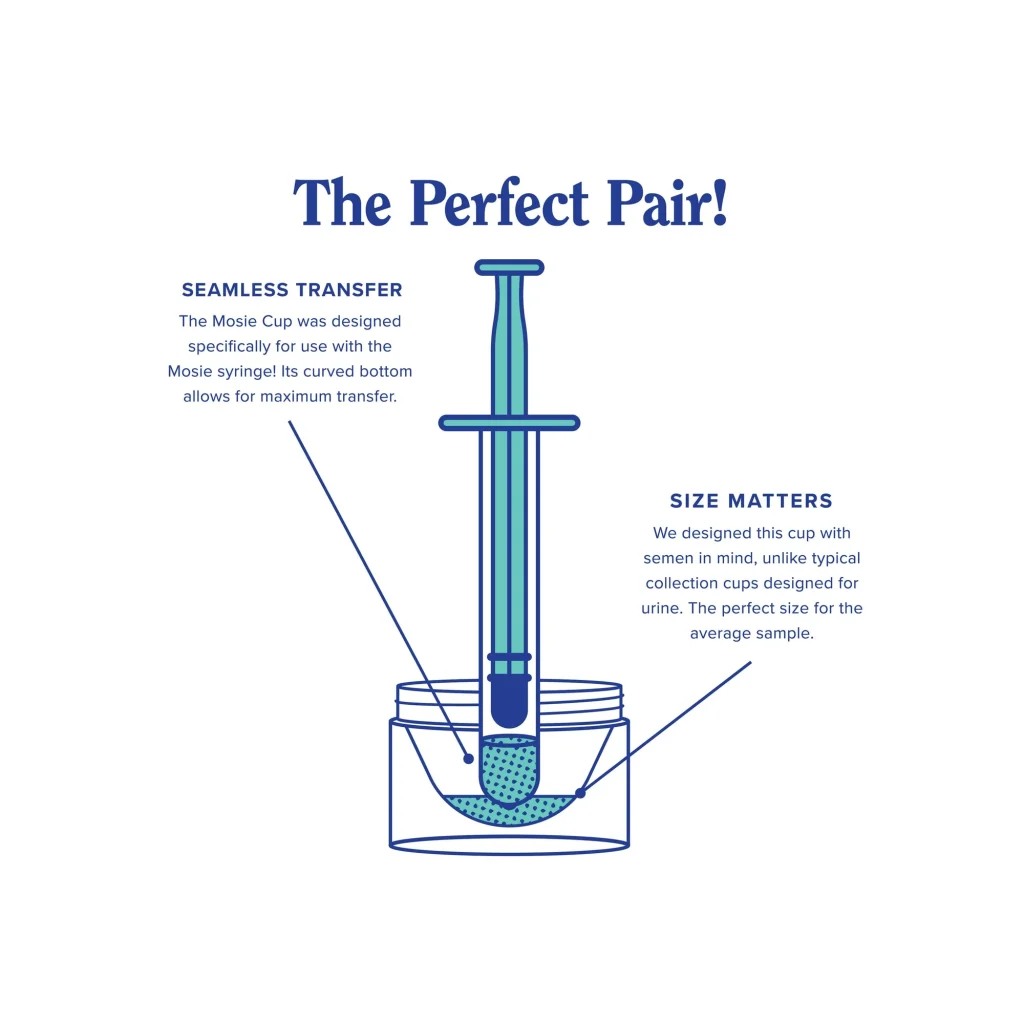
2) Choose a kit that supports control and comfort
Look for a kit designed for vaginal use, with smooth edges and materials intended for body contact. Avoid improvised tools. If you’re shopping, this at home insemination kit anchor can be a starting point for comparing options.
3) Collection: keep it simple and sperm-friendly
Use a clean, sperm-safe collection container if your kit includes one. Avoid saliva as a lubricant. Many common lubes can reduce sperm motility, so choose sperm-safe products if you need them.
Temperature and time matter. Use the sample promptly, and keep it at a comfortable room/body temperature range. Don’t microwave, heat, or refrigerate unless a clinician has given specific instructions.
4) Insemination: slow, steady, and shallow
ICI aims near the cervix, not deep into the uterus. Insert only as far as is comfortable. Then depress the plunger slowly to reduce leakage and cramping. Rushing is the most common “technique” mistake.
If you feel sharp pain, stop. Discomfort can happen, but pain is a signal to reassess and consider medical guidance.
5) Positioning: pick what you can repeat
Many people lie on their back with hips slightly elevated for 10–20 minutes. Others prefer side-lying. The “best” position is the one that keeps you relaxed and consistent across attempts.
6) Cleanup: gentle is the rule
Expect some leakage later—this is normal. Avoid douching or harsh soaps. Warm water and mild, external-only cleansing is enough. Clean reusable components exactly as directed by the manufacturer.
When it’s time to seek help (and what to ask for)
At-home ICI can be a reasonable first step for some people, but it’s not a cure-all. Consider a clinician visit sooner if any of these apply:
- Irregular or very long cycles (timing becomes guesswork).
- Known conditions (PCOS, endometriosis, thyroid disease) or history of pelvic infection.
- Significant pain with sex, exams, or insertion.
- Multiple miscarriages or known genetic concerns.
- Suspected sperm-factor issues (low count, low motility, prior vasectomy reversal, etc.).
Useful first tests to discuss often include basic hormone labs, ovulation assessment, and a semen analysis. Ask what results would change your plan. That keeps the process grounded.
FAQ
Is ICI the same as IVF?
No. ICI places semen at the cervix using a syringe-like applicator, while IVF involves eggs being fertilized in a lab and embryos transferred into the uterus.
How long should you stay lying down after ICI?
Many people choose 10–20 minutes for comfort and peace of mind. There’s no single proven “perfect” time, so pick what feels manageable.
Can you do ICI if you’re over 35?
Some people do, but fertility varies widely by age and individual factors. If you’re concerned about timing, consider earlier testing and a plan with a clinician.
What lube is safe when trying to conceive?
Avoid lubricants that can harm sperm. If you use lube, look for fertility-friendly options labeled as sperm-safe.
When should we stop trying at home and get help?
If you’ve tried consistently without success for months, have irregular cycles, known fertility conditions, pain, or repeated pregnancy loss, it’s reasonable to seek a medical evaluation sooner rather than later.
Next step
If you want a clear overview before you buy supplies or pick a day to try, start here and keep it simple. The goal is a repeatable routine, not a perfect performance.
How does at-home insemination (ICI) work?
Medical disclaimer: This article is for general education and does not replace medical advice. It does not diagnose, treat, or provide individualized fertility care. If you have pain, heavy bleeding, fever, or concerns about fertility or infection risk, contact a qualified clinician.
