

Myth: A home insemination kit is basically a “DIY IVF.”
Reality: At-home insemination (ICI) is a simpler method. It can be a reasonable first step for some people, but it’s not the same as clinic-based options.

Right now, people aren’t just talking about pregnancy announcements and TV plot twists. They’re also tracking court cases and shifting rules around reproductive health. That mix of pop culture and policy has pushed more searches for practical, private fertility options at home.
What’s trending (and why it’s pushing people to home options)
Three conversations keep colliding:
- Reproductive rights in the courts: Ongoing litigation and changing policies make many people want a plan that feels more in their control.
- Social-media “pre-pregnancy” hacks: Viral planning trends can sound medical, but they often skip nuance. If a trend feels like a shortcut, treat it like marketing until a clinician confirms it fits your body.
- Pregnancy in entertainment: Shows often write real pregnancies into storylines, which makes conception look fast and predictable. Real cycles rarely follow a script.
And yes, even animal-science headlines about IVF progress can spark curiosity. The takeaway: fertility tech keeps evolving, but most people still start with basics—timing, comfort, and good hygiene.
What matters medically (simple ICI facts you should know)
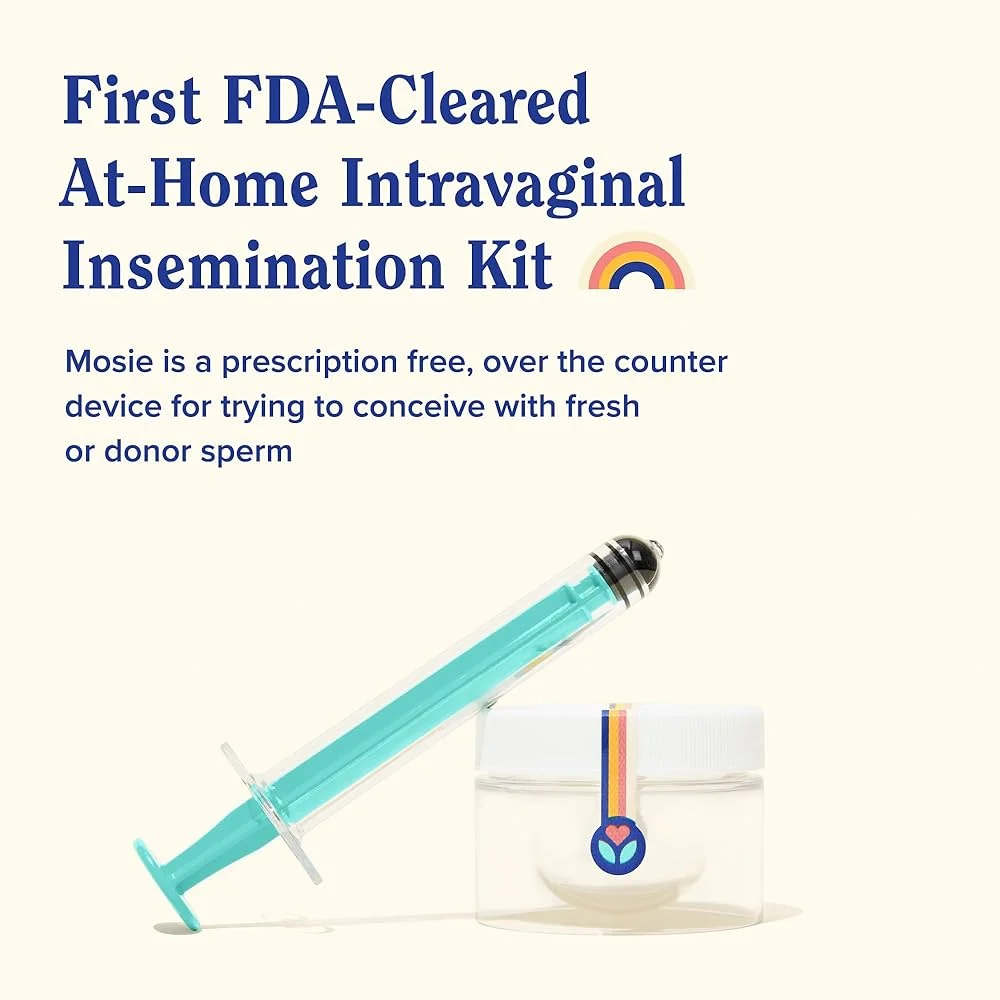
ICI stands for intravaginal (or intracervical) insemination. In practice, you place semen into the vagina using a needleless syringe. Sperm then travel through the cervix and uterus on their own.
ICI vs. IVF: IVF involves retrieving eggs and fertilizing them in a lab. ICI does not. If you’re comparing options, think of ICI as “low intervention,” not “home IVF.”
Timing matters more than gadgets. A perfect setup can’t compensate for inseminating far from ovulation. If you only optimize one thing, optimize the window.
Quick safety note: This article is educational, not medical advice. For personalized guidance—especially with pain, bleeding, known conditions, or donor considerations—talk with a licensed clinician.
How to try at home (ICI) with less mess and more confidence
This is the no-drama checklist approach. Keep it clean, keep it calm, and keep the steps repeatable.
1) Choose a simple, body-safe tool set
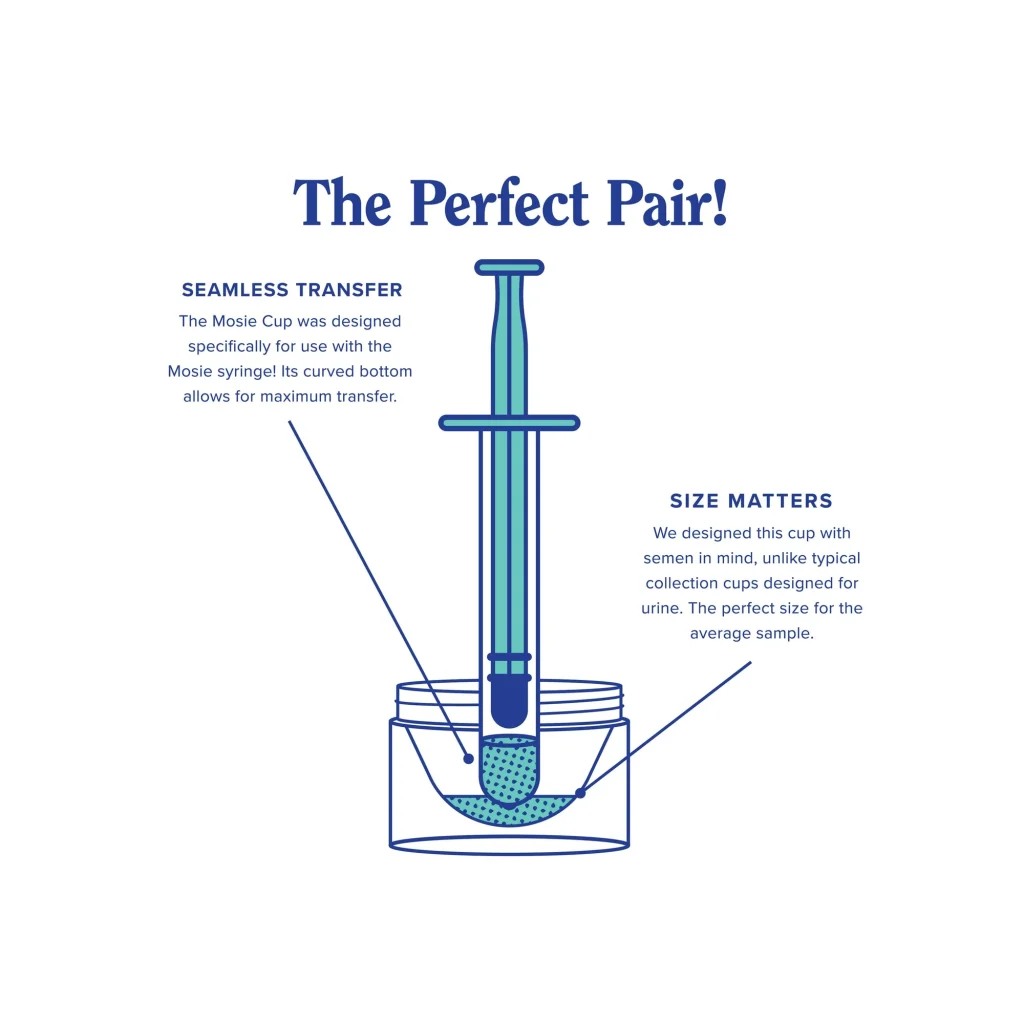
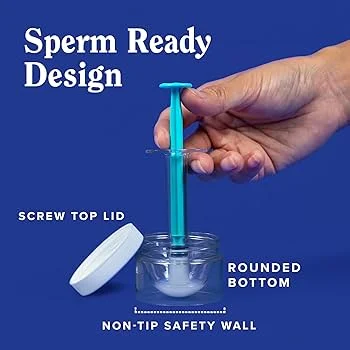
- Needleless syringe: Designed for gentle placement. No needles. No sharp edges.
- Collection container (if needed): Clean, body-safe, and easy to handle.
- Optional comfort items: Towel, unscented wipes, and a pillow for hip support.
Avoid scented lubricants or harsh soaps right before insemination. Irritation can make the experience harder than it needs to be.
2) Get timing “good enough,” not perfect
For many people, the best target is the day of a positive ovulation test and/or the day after. If you’re tracking, combine signals:
- Ovulation predictor kits (OPKs)
- Changes in cervical mucus (often clearer and stretchier near ovulation)
- Cycle history (useful, but not foolproof)
If your feed is pushing “trimester zero” planning, keep your filter on. Trends can motivate healthy habits, but they can also create pressure that backfires.
3) Positioning that prioritizes comfort
You don’t need acrobatics. Pick a position you can hold without strain:
- On your back with knees bent
- Hips slightly elevated with a pillow (comfort-focused, not mandatory)
- Side-lying if that helps you relax
Tension makes everything feel more complicated. Calm breathing helps more than another “hack.”
4) Placement and pacing (gentle wins)
Move slowly. Insert the syringe just enough to place semen comfortably into the vaginal canal. Then depress the plunger steadily.
If you feel sharp pain, stop. Pain isn’t a “push through it” signal.
5) The cleanup plan (so you’ll actually repeat the routine)
- Stay lying down briefly if it feels good. Stressing about gravity won’t help.
- Use a towel or pantyliner afterward. Leakage is normal.
- Wash hands and dispose/clean items per product instructions.
Consistency across attempts matters. A simple routine you’ll repeat beats an elaborate one you dread.
When to get help (and what to ask for)
At-home ICI can be a starting point. It’s not the right finish line for everyone.
- Time-based rule of thumb: Consider evaluation after 12 months of trying if under 35, or after 6 months if 35+.
- Earlier is smart if: cycles are very irregular, you have severe pelvic pain, known reproductive conditions, prior pelvic infections, or repeated pregnancy loss.
- If using donor sperm: Ask about screening, storage/handling, and legal parentage steps in your location.
Also consider the “systems” angle. Many people now use apps and prediction tools to track cycles. Some even use models inspired by home insemination kit to forecast fertile windows. That can be helpful, but it’s still an estimate—not a diagnosis.
FAQ (quick answers)
Is ICI safe?
It can be, when you use clean supplies, avoid irritating products, and stop if there’s pain or unusual bleeding. A clinician can advise if you have medical risk factors.
Does orgasm increase success?
Evidence is mixed. If it helps you relax and enjoy the process, that’s a valid reason. Don’t treat it as a requirement.
Can I do ICI multiple days in a row?
Some people try across the fertile window. If you’re unsure about timing or frequency for your situation, ask a fertility clinician.
Next step: pick a kit that keeps the process simple
If you’re trying ICI at home, your goal is repeatable technique: gentle placement, low stress, and easy cleanup. Start with a purpose-built option like an at home insemination kit for ICI so you’re not improvising with the wrong tools.
How does at-home insemination (ICI) work?
Medical disclaimer: This content is for general education and does not replace medical advice. It does not diagnose, treat, or recommend specific clinical protocols. If you have health concerns, severe pain, abnormal bleeding, or complex fertility history, consult a licensed healthcare professional.