Tag: sterile environment

  • The Dos and Don’ts of Using an Insemination Syringe for Pregnancy Planning

    Blog Post:

    Pregnancy planning can be an exciting and overwhelming journey for many individuals. With advancements in technology and medicine, there are now various methods to help couples and individuals achieve their dream of starting or expanding their family. One of these methods is using an insemination syringe, also known as a turkey baster method, which involves injecting semen into the cervix for fertilization. While it may seem like a simple and straightforward process, there are dos and don’ts that one should be aware of when using an insemination syringe for pregnancy planning. In this blog post, we will discuss the dos and don’ts of using an insemination syringe to help you have a successful and safe pregnancy journey.

    The Dos:

    1. Consult with a medical professional: Before using an insemination syringe, it is crucial to consult with a medical professional. They can provide you with important information and guidance on the process, potential risks, and any necessary precautions. They can also help determine if this method is suitable for you and your partner, based on your health and medical history.

    2. Choose a high-quality syringe: When it comes to using an insemination syringe, not all syringes are created equal. It is essential to choose a high-quality syringe that is specifically designed for this purpose. These syringes have a smooth, rounded tip, and are made of medical-grade materials, ensuring safety and effectiveness.

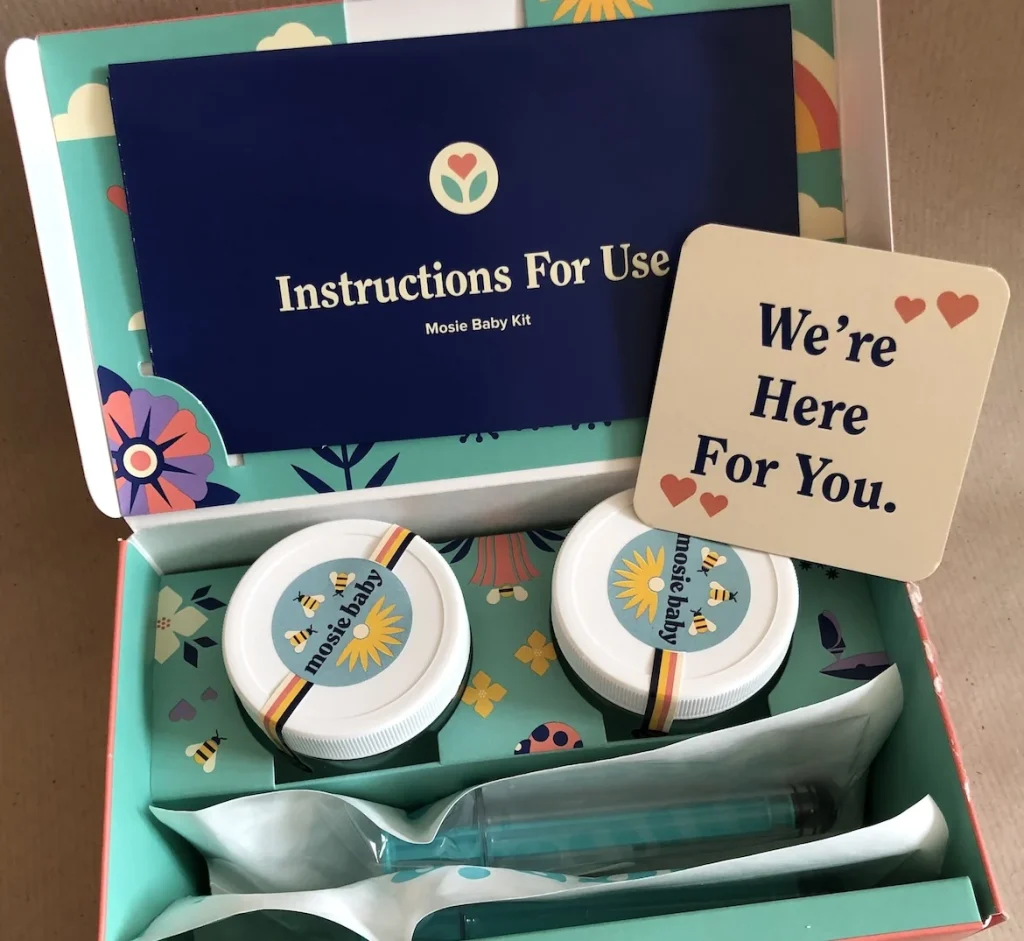
    3. Follow the instructions carefully: Each insemination syringe may come with different instructions, so it is crucial to carefully read and follow them. It is also essential to understand the proper technique for using the syringe, as incorrect usage may lead to injury or ineffective results.

    4. Track your ovulation cycle: Timing is crucial when it comes to using an insemination syringe. It is essential to track your ovulation cycle to determine the best time to use the syringe. This can increase the chances of successful fertilization and pregnancy.

    5. Use a sterile environment: It is crucial to maintain a sterile environment when using an insemination syringe to avoid any potential infections. Make sure to thoroughly clean the syringe and your hands before use, and use disposable gloves if necessary.

    Baby wearing a blue shirt with "made with Love" text, surrounded by colorful floral and butterfly designs.

    The Dos and Don'ts of Using an Insemination Syringe for Pregnancy Planning

    6. Remain in a comfortable position: When using an insemination syringe, it is essential to remain in a comfortable position. This can help relax your muscles and make the process more comfortable. You can try lying down with your hips slightly elevated or using a pillow for support.

    7. Stay hydrated: Staying hydrated is crucial for overall health and can also help with the pregnancy journey. It can also help thin out cervical mucus, making it easier for sperm to reach the egg. So make sure to drink plenty of water throughout your pregnancy planning process.

    The Don’ts:

    1. Don’t use an expired syringe: Just like any other medical device, insemination syringes have an expiration date. It is essential to check the expiration date before using the syringe and to discard it if it has expired. Using an expired syringe can affect its effectiveness and may also cause infections.

    2. Don’t use a syringe with damaged packaging: If the packaging of the syringe is damaged or tampered with, do not use it. It is crucial to use a syringe that is properly sealed to ensure its sterility and safety.

    3. Don’t use too much force: It is essential to handle the syringe with care and avoid using too much force when inserting it. Using too much force can cause injury and may also affect the effectiveness of the syringe.

    4. Don’t use an insemination syringe as a substitute for medical treatment: Insemination syringes are meant to assist with pregnancy planning, but they should not be used as a substitute for medical treatment. If you are experiencing fertility issues, it is essential to consult with a medical professional for proper diagnosis and treatment.

    5. Don’t reuse the syringe: Insemination syringes are meant for single-use only and should not be reused. Reusing the syringe can cause contamination and may also affect its effectiveness. Make sure to properly dispose of the syringe after use.

    In summary, using an insemination syringe for pregnancy planning can be an effective method for many individuals. However, it is crucial to follow the dos and don’ts mentioned above to ensure a safe and successful pregnancy journey. Consulting with a medical professional, choosing a high-quality syringe, and following the instructions carefully are essential steps for a positive experience. Remember to track your ovulation cycle, maintain a sterile environment, and stay hydrated throughout the process. Avoid using expired or damaged syringes, using too much force, and reusing the syringe to avoid potential risks and complications. By following these dos and don’ts, you can increase your chances of a successful pregnancy and make your journey as smooth as possible.

  • Creating a Safe and Sterile Environment for Home Insemination

    Creating a Safe and Sterile Environment for Home Insemination: A Step-by-Step Guide

    Home insemination has become a popular option for couples and individuals looking to conceive without the help of a medical professional. It offers a more private and cost-effective alternative to traditional fertility treatments. However, when it comes to home insemination, it is important to ensure that the environment is safe and sterile to avoid any potential risks or complications. In this blog post, we will discuss the steps you can take to create a safe and sterile environment for home insemination.

    Step 1: Gather all the necessary materials

    Before starting the insemination process, it is crucial to gather all the necessary materials and equipment. This includes a sterile syringe, specimen collection cup, sterile container, sterile lubricant, ovulation predictor kit, and any other items recommended by your healthcare provider. Make sure to check the expiration dates on all materials and dispose of any expired items.

    Step 2: Clean and disinfect the workspace

    The first step in creating a safe and sterile environment is to clean and disinfect the workspace. Start by wiping down all surfaces with a disinfectant cleaner. Pay special attention to the area where the insemination will take place, as well as any equipment that will be used. It is also important to wash your hands thoroughly with soap and water before handling any materials.

    Step 3: Prepare the specimen

    Before proceeding with the insemination, it is important to properly prepare the specimen. If using fresh semen, make sure it is collected in a sterile container and kept at body temperature until ready to use. If using frozen semen, follow the instructions provided by the sperm bank or fertility clinic for thawing and handling the specimen.

    logo featuring a pink heart above two teal leaves on a blue circular background

    Creating a Safe and Sterile Environment for Home Insemination

    Step 4: Use a sterile syringe

    When it comes to home insemination, it is important to use a sterile syringe. This means using a new, unopened syringe for each insemination attempt. It is also important to avoid touching the tip of the syringe or allowing it to come into contact with any surfaces before use. This will help prevent any bacteria or contaminants from entering the uterus.

    Step 5: Use sterile lubricant

    While lubricant can be helpful in making the insemination process more comfortable, it is important to use a sterile lubricant to avoid any potential contamination. Choose a water-based lubricant over oil-based ones as they are less likely to interfere with sperm motility. Apply the lubricant to both the syringe and the cervix before insertion.

    Step 6: Time the insemination correctly

    Timing is everything when it comes to home insemination. Make sure to use an ovulation predictor kit to determine the most fertile days of your menstrual cycle. It is recommended to inseminate on the day of ovulation or one day before to maximize the chances of conception. It is also important to follow the instructions provided with the kit to ensure accurate results.

    Step 7: Clean up and dispose of materials properly

    Once the insemination is complete, it is important to properly clean up and dispose of all materials. Dispose of the syringe and any other single-use items in a biohazard bag or container. Wash and disinfect any reusable equipment thoroughly before storing them away.

    In summary, creating a safe and sterile environment for home insemination involves gathering all necessary materials, cleaning and disinfecting the workspace, preparing the specimen, using a sterile syringe and lubricant, timing the insemination correctly, and properly cleaning up and disposing of materials. Following these steps will help minimize the risk of any potential complications and increase the chances of a successful home insemination.

  • Home Insemination: What You Need to Know

    Blog Post: Home Insemination: What You Need to Know

    The idea of starting a family is a dream for many people, and for some, the journey may require alternative methods such as home insemination. Home insemination is the process of placing sperm into the reproductive tract of a person in hopes of fertilization and pregnancy. While it may seem intimidating or complex, home insemination can be a safe and effective option for those looking to conceive. In this blog post, we’ll discuss everything you need to know about home insemination.

    1. Understand Your Options: There are different methods of home insemination, and it’s essential to understand your options before proceeding. The most common method is known as the “turkey baster” method, where sperm is collected into a sterile cup and then inserted into the vagina using a turkey baster or syringe. Another option is using a cervical cap, which is a small, silicone cup that covers the cervix and holds the sperm close to the cervical opening. It’s essential to do your research and consult with a medical professional to determine which method is best for you.

    2. Consider Your Fertility: Before trying home insemination, it’s crucial to understand your fertility. If you or your partner have any known fertility issues, it’s essential to seek medical advice before attempting home insemination. Additionally, tracking your ovulation can increase your chances of success. There are many ovulation tracking methods available, such as tracking your basal body temperature, using ovulation predictor kits, or monitoring changes in cervical mucus. Knowing when you’re most fertile can increase your chances of sperm reaching the egg.

    3. Choose a Donor: One of the most critical factors in home insemination is choosing a donor. You can either use a known donor, such as a friend or family member, or purchase donor sperm from a sperm bank. If you choose to use a known donor, it’s crucial to have an open and honest conversation about expectations, boundaries, and legalities. Using a sperm bank can provide more anonymity and ensure the donor has undergone necessary medical screenings. Whichever option you choose, it’s vital to have a written agreement outlining the details of the donation and your expectations.

    Mosie Baby kit with two jars, a syringe, and a supportive message card inside a colorful box.

    Home Insemination: What You Need to Know

    4. Create a Sterile Environment: When attempting home insemination, it’s crucial to create a sterile environment to reduce the risk of infection. Wash your hands thoroughly, use sterile equipment, and follow all instructions carefully. If using a cervical cap, make sure to clean it thoroughly before and after use. It’s also essential to use fresh sperm and not freeze-thawed sperm, as this can decrease its viability.

    5. Timing is Everything: Timing is crucial when it comes to home insemination. Sperm can survive in the female reproductive tract for up to five days, so it’s best to inseminate a couple of days before ovulation and again on the day of ovulation to increase your chances. However, it’s essential to remember that every person’s body is different, and there is no guarantee of pregnancy. It may take multiple attempts to be successful, so it’s essential to remain patient and not get discouraged.

    6. Be Prepared for Emotional Challenges: Trying to conceive can be an emotional rollercoaster, and home insemination is no exception. It’s essential to have open communication with your partner, manage expectations, and take care of your mental health. It’s normal to feel overwhelmed, anxious, or disappointed, but it’s crucial to stay positive and keep trying if it’s something you truly want.

    7. Seek Medical Advice: While home insemination can be a viable option for some, it’s essential to seek medical advice if you’re struggling to conceive. A fertility specialist can provide you with more information about your fertility, recommend alternative options, or provide necessary medical treatments to increase your chances of pregnancy.

    In summary, home insemination can be a safe and effective option for those looking to start a family. It’s crucial to understand your options, fertility, and take necessary precautions to create a sterile environment. Timing, choosing a donor, and seeking medical advice are all essential factors to consider. And most importantly, remember to take care of your emotional well-being throughout the process.