Building Your Family on Your Terms: Home Insemination Starter Pack
Starting a family is a dream for many individuals and couples, but traditional methods may not always be feasible or desirable. For those looking to build their family on their own terms, home insemination can be a viable option. It allows for a more intimate and controlled experience, while also being more cost-effective. In this blog post, we will provide a comprehensive guide to help you navigate the process of home insemination and create your own Home Insemination Starter Pack.
What is Home Insemination?
Home insemination, also known as artificial insemination, is the process of manually placing sperm into the reproductive tract of a female in order to achieve pregnancy. It can be done at home with the help of a donor or a partner, or with the assistance of a medical professional. This method is commonly used by same-sex couples, single individuals, or those who are struggling with fertility issues.
Benefits of Home Insemination
There are several benefits to choosing home insemination as a method for starting your family. One of the main advantages is the ability to have more control over the process. You can choose the timing, location, and method that works best for you. Home insemination also eliminates the stress and cost of a medical setting, making it a more comfortable and affordable option. Additionally, it allows for a more intimate experience between partners or with a known donor.
Home Insemination Starter Pack Essentials
Before embarking on the home insemination process, it is important to have all the necessary supplies and tools. Here are some essential items that should be included in your Home Insemination Starter Pack:
1. Quality Sperm Donor or Partner: The first step in home insemination is to find a quality sperm donor or partner. This can be someone you know or a donor from a reputable sperm bank. It is important to thoroughly screen any potential donors for genetic and medical history, as well as personal and legal considerations.
2. Ovulation Predictor Kits: In order to increase your chances of success, it is important to track your ovulation cycle. Ovulation predictor kits can help you determine the most fertile days to inseminate.
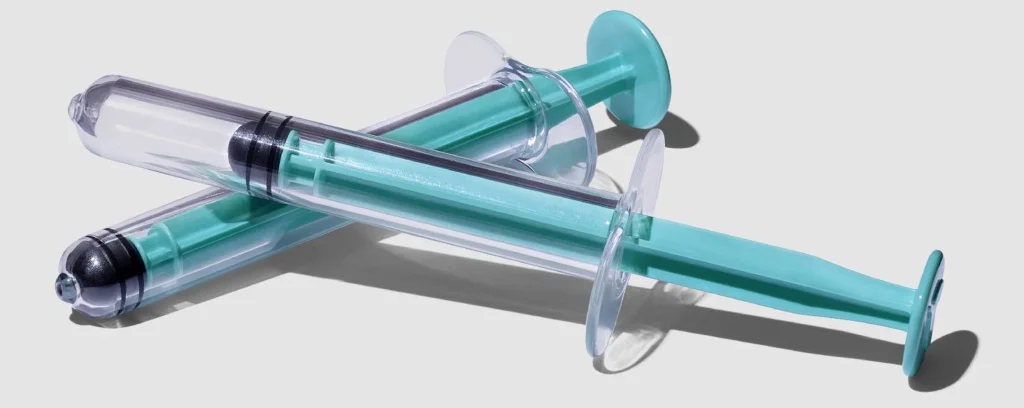
3. Syringe or Softcup: These are the two main methods for insemination. A syringe allows for more precise placement of the sperm, while a Softcup can be inserted and worn for several hours to increase the chances of insemination.
4. Lubricant: It is important to use a fertility-friendly lubricant, as some types of lubricants can harm sperm mobility. Look for a lubricant that is specifically designed for fertility purposes.
5. Basal Thermometer: A basal thermometer is used to track your basal body temperature (BBT), which can help determine when you are ovulating.
6. Insemination Instructions: Having detailed instructions on hand is important for a successful home insemination. These can be found online or provided by your sperm donor or medical professional.
Building Your Family on Your Terms: Home Insemination Starter Pack
7. Support System: The home insemination process can be emotional and stressful, so having a support system in place is crucial. This can include a partner, family member, or friend who can offer emotional support and help with the process.
Performing Home Insemination
Once you have all the essential items, you can begin the home insemination process. It is important to carefully follow the instructions and maintain a sterile environment to ensure the best chances of success. Here are some general steps to follow:
1. Prepare the sperm: If using a donor, make sure to thaw the sperm according to the instructions provided. If using fresh sperm, it should be collected and used within an hour.
2. Track ovulation: Use an ovulation predictor kit or track your BBT to determine when you are ovulating.
3. Prepare the insemination area: Make sure the area is clean and sterile. This can be a bed with a towel or a clean bathroom floor.
4. Prepare the syringe or Softcup: If using a syringe, draw up the sperm and remove any air bubbles. If using a Softcup, follow the instructions provided.
5. Inseminate: Follow the instructions provided for your chosen method of insemination. The sperm should be placed as close to the cervix as possible.
6. Rest: After insemination, it is recommended to lay down for at least 20 minutes to allow the sperm to travel towards the cervix.
7. Wait and test: Wait for the recommended time frame before taking a pregnancy test. If the test is positive, congratulations! If not, you may need to try again in the next ovulation cycle.
Conclusion
Home insemination can be a rewarding and intimate experience for those looking to build their family on their own terms. With the right preparation and tools, you can increase your chances of success and enjoy the journey of starting your family. Remember to always consult with a medical professional and thoroughly research the process before beginning.
Summary:
Home insemination is a viable and cost-effective method for building your family on your own terms. It allows for more control, intimacy, and affordability compared to traditional methods. To successfully perform home insemination, it is important to have a Home Insemination Starter Pack that includes essential items such as a quality sperm donor or partner, ovulation predictor kits, syringe or Softcup, fertility-friendly lubricant, and a support system. Following the proper steps and maintaining a sterile environment can increase your chances of success. Always consult with a medical professional and thoroughly research the process before beginning.
Leave a Reply